Mixed Media Materials - A Good Heart

Hello, all! Today, we're talking about the materials I used to create this artwork and why I chose them specifically.

This piece "A Good Heart," was created because I was in the mood to mess with an old canvas. This canvas had a fluid art pour using Sargent Art 6 Mixing Medium Liquid Metals Acrylic Paint (no longer available) on it, and I had covered it in Handy Art Modeling Paste in opaque white then pulled a few toothy tools through it to make marks you could see the pour through.
I pulled out some stencils and randomly applied both modeling paste and clear pearl medium by Golden.
I added DecoArt crackle paste to the middle to lighten it and give it texture. I then applied Finnabair metallic waxes in three colors around the edges with a stiff brush so it went into all the delicious little cracks and decoupaged a rose or two with some ModPodge clear matte.
From there, I pulled out a couple of pieces I'd created from Finnabair molds and started arranging them to see what my composition might look like.


Once I thought I was happy, I set the work aside and went on to do other things. During that time, I created a resin butterfly wing with a billion tiny beads and mica powder. I decided THAT would be the central piece. I again laid out my pieces the way I thought I wanted them and attached just the wing with Liquitex heavy gel medium and allowed it to dry completely.
I then had to contemplate the actual body of the butterfly. I decided to just build it with wooden spheres from the craft store and that white modeling paste. I took some thin armature wire, cut it, and bent it for the legs, antenna, and proboscis. All of those were attached with modeling paste or clear gel medium. I used these flat rocks to hold the shape as it dried.
His tail end is made of some kind of textured tissue I got in a gift, and the blue stones are Crushed Glass for Resin Art for Crafts Ocean Blue Broken Pieces that are set in the modeling paste. Once it was dry, I covered it in Liquitex black gesso and painted the eyeball gold. :)

During this time, I also added smushy tissue paper by crunching it up and dabbing it with a brush soaked in thinned gel medium. My fingers got involved when it needed to curl, but once you wet it, you gotta work fast. It falls apart. Again, something I got in a gift. I painted it all in a complimentary color with Sparks paint once it was dry.

After putting the artwork across the room and staring at it for a long time, I decided to add washi tape with butterflies on it to the bottom. They were peeled and applied, and I covered them with clear gesso before spreading a bit more crackle medium on top of them to embed them in the piece. I waxed that as well. Other clear bits were added to the bottom right corner that included plastic flowers of various types. A little clear-ish dragonfly was added, and hummingbird charms were placed throughout.

At some point in the process, I decided to flow something into the crevices I'd created with the toothy tool, so I added this honeycomb ink. I won't tell you who made it because you can no longer buy it. They stopped production. Hey, I pick things up on clearance, okay? Do I always know what I'm getting? No. Do those things usually get used? Yes. Look how PRETTY!

I always add my flowers and large embellishments like these clear half pearl things near the end. All these are Finnabair paper and mechanical flowers in a limited color range to match what I had going on. I also painted the damned resin wings because I ended up hating the look of them.


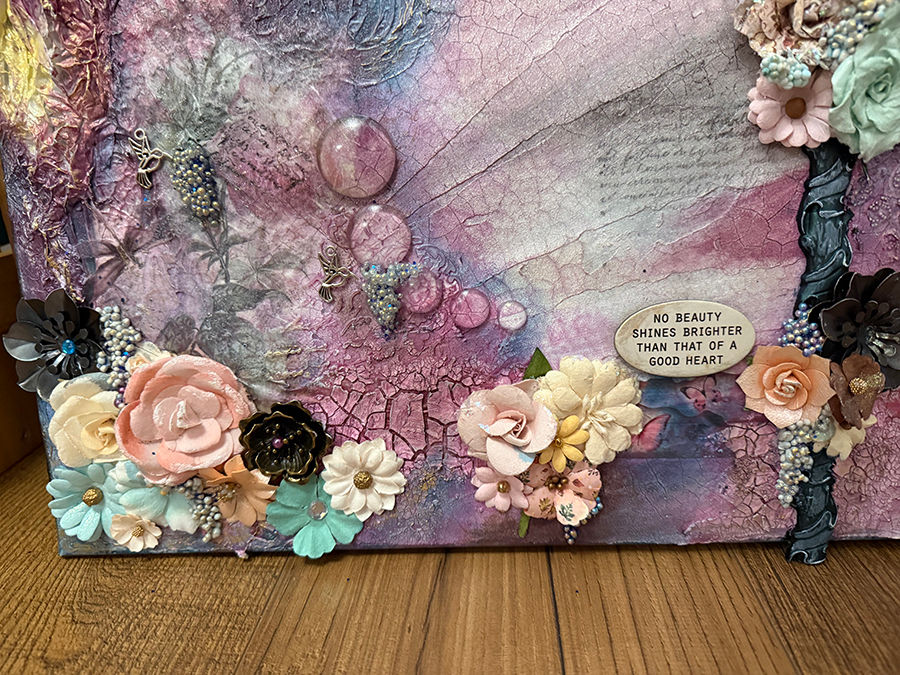
I only add the small beads, glitter, and any other pearls or gems (again in similar or complimentary colors) at the very end. Yes, that's a beetle earring I found stupidly charming. I got him at Amazon. Broken jewelry or junk jewelry is your friend. :)
Once everything had time to dry, I used a stiff brush with a small amount of white Liquitex gesso to hit every high point on the canvas. It brings the cracks and beads to life, and it will bring out any texture that was built up when the artwork was started.
As an artist, one of the things I love most is not knowing where something will go when I begin. I have a loose idea, but I allow things to morph and grow as needed along the way. If I could give you one piece of advice, it would be not to marry yourself to any part of your art as you create it. Before you add it, remember you need to be willing to give it up for the good of the piece later if need be.
My future blog posts here will be a bit chattier, but I wanted to give you all a good idea of what kinds of products I use and how I use them before we get super friendly. If videos of my hands making the art would help, I'd like to know! Feel free to email me or leave me a comment. I'm all about feedback and exchange of ideas!
Well, that's all for today, y'all! Until next time, ART ON!
Comments